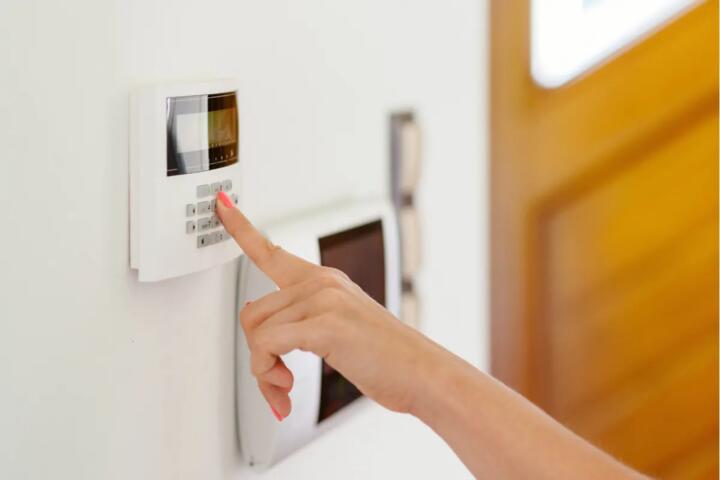
Choosing a home security system without overpaying comes down to matching features to your actual risks and understanding total cost of ownership (equipment plus monitoring, installation, and ongoing maintenance). This guide explains how home security works, how to compare the main system types, and how to build a practical plan you can execute step by step—without buying extras you don’t need.
Start with the goal: what “security” actually means
Most home security systems aim to achieve one or more of these outcomes:
- Deterrence: visible cameras, lights, and alarm signage can discourage opportunistic activity.
- Detection: sensors (door/window, motion, glass-break) identify events like entry or movement.
- Verification: cameras and audio help confirm what triggered an alert.
- Response: monitored systems can dispatch help; unmonitored systems rely on you (or neighbors) to respond.
- Evidence: recorded video and event logs can support insurance claims or police reports.
Overpaying usually happens when a package is built around marketing bundles rather than your priorities. Before comparing brands, decide which outcomes matter most for your home.
Key terms you’ll see in every security pitch
Monitored vs unmonitored
- Monitored: a third-party monitoring center receives an alarm signal and can contact you and/or dispatch emergency services according to the service agreement.
- Unmonitored: the system alerts you directly (push notifications, siren, app), and you handle response.
Monitored service typically costs more monthly, but it can reduce the time between an alarm and a response—especially if you’re away or asleep.
Wired vs wireless
- Wired systems connect sensors to a control panel via physical wiring. They can be more reliable for power and signal, but installation is more invasive.
- Wireless systems use radio signals between sensors and a hub (or use direct-to-network devices). They’re easier to install but require attention to battery health and signal strength.
Wireless doesn’t automatically mean “worse,” but it does mean you should plan for battery replacement and check placement to avoid weak signal areas.
Cellular vs Wi‑Fi vs Ethernet
- Wi‑Fi: uses your home internet; performance depends on router placement and network reliability.
- Ethernet: uses a wired internet connection; often more stable than Wi‑Fi.
- Cellular: uses a cellular connection; can provide redundancy if internet goes down (availability depends on the system).
If you want to avoid overpaying, don’t assume every system includes redundancy. Check what communication path(s) are actually supported for alarm signals.
Local storage vs cloud storage
- Local: video stored on an onboard device (e.g., an NVR or hub storage).
- Cloud: video stored on the provider’s servers, often requiring a subscription.
Cloud subscriptions can be a major recurring cost. If you only need short clips for verification, local storage may be sufficient; if you need remote access and longer retention, cloud may be worth it.
Understand the main system types (and where costs hide)
Home security offerings generally fall into a few categories. The “best” choice depends on how you want to respond to alerts and how much video you need.
1) DIY self-monitoring with app alerts
These systems typically include a hub (or hub-less devices), sensors, and an app. You receive notifications and decide what to do.
- Pros: lower monthly cost; often flexible component-by-component expansion.
- Cons: you’re the response layer; false alarms can be your burden.
Where overpaying happens: buying high-end cameras with features you won’t use (e.g., advanced analytics) or paying for cloud storage when local storage would meet your needs.
2) DIY with professional monitoring
Same DIY installation approach, but the system sends alarm signals to a monitoring center.
- Pros: faster response capability; often good for people who travel or work irregular hours.
- Cons: recurring monitoring fees; some features may require subscriptions.
Where overpaying happens: signing up for a monitoring plan that includes video storage or premium camera features you don’t need.
3) Professionally installed monitored systems
These are installed by a service provider and monitored by them.
- Pros: installation support; can be helpful for larger homes or complex wiring.
- Cons: installation fees and equipment markups are common; contracts can limit flexibility.
Where overpaying happens: paying for a full package when a smaller sensor set would cover your highest-risk entry points.
4) Camera-first security
Some buyers focus on cameras and use motion detection and alerts as the primary security layer.
- Pros: strong evidence and verification; useful for driveways and outdoor areas.
- Cons: cameras alone may miss entry if you don’t also use door/window sensors; video subscriptions can add up.
Where overpaying happens: buying multiple cameras without sensors, then relying on motion alerts that can be noisy (pets, traffic, shadows).
Build your system from the “coverage map,” not the brochure
A cost-effective system is usually the one that covers the right places with the right sensor types. Start by mapping your home’s likely entry points and your daily routines.
Step 1: Identify entry points and high-value areas
- Doors: front, back, garage door (if applicable), and any side doors.
- Ground-floor windows: especially those near pathways or landscaping.
- Accessible areas: patios, basement entrances, and areas with easy reach.
- High-value rooms: where you’d want evidence or faster detection (e.g., home office, valuables storage).
Step 2: Choose sensor types that match the threat
- Door/window contact sensors: detect opening/closing. They’re often the most cost-effective way to detect entry.
- Motion sensors: detect movement in a zone. They can be useful indoors but may require careful placement to reduce false alarms.
- Glass-break sensors: detect the sound signature of breaking glass. They can complement window coverage.
- Outdoor motion detection: can be helpful, but it’s more prone to false alerts from weather and activity.
General guidance: if you’re trying to avoid overpaying, prioritize entry-point detection (contacts) before adding more advanced sensors.
Step 3: Decide where cameras add real value
Cameras are most valuable when they:
- cover approach paths (driveway, walkway, porch),
- provide identification evidence (faces, vehicle details), and
- support verification when an alarm triggers.
They’re less valuable if they mostly capture irrelevant motion or if you won’t review footage.
Step 4: Plan for connectivity and power
- Wi‑Fi coverage: check signal strength at sensor locations and camera mounting points.
- Power: battery-powered devices require maintenance; hardwired devices require installation planning.
- Redundancy: if you want alarms to work during internet outages, confirm whether the system supports cellular or another backup path.
Compare costs the right way: total cost of ownership
To avoid overpaying, compare systems using a total cost model rather than the upfront price.
What to include in your budget
- Equipment: hub/control panel, sensors, cameras, sirens, and any required accessories.
- Installation: DIY time is “free” money-wise, but professional installation may add a significant upfront cost.
- Monitoring: monthly or annual monitoring fees (if applicable).
- Video storage: cloud subscriptions and/or retention upgrades.
- Maintenance: battery replacements, occasional device replacements, and app/account management.
- Hardware upgrades: some systems require newer hubs or subscriptions for certain features.
A simple cost comparison table
| Cost category | What to check | Why it matters |
|---|---|---|
| Monitoring | Is monitoring required for alarm response? Is there a contract? | Recurring fees can dominate cost over time. |
| Video storage | Local vs cloud; retention length; per-camera vs plan-based pricing. | Cloud subscriptions can add up quickly. |
| Connectivity | Wi‑Fi only vs cellular backup; Ethernet support. | Alarm reliability depends on the communication path. |
| Power & batteries | Battery life claims and replacement expectations; hardwired options. | Neglecting batteries can cause sensor outages. |
| Expansion | Whether you can add sensors/cameras later without replacing the hub. | Upgrades can be cheaper than replacing a whole system. |
How to choose components without buying “the whole bundle”
Most overpaying happens when buyers purchase a full kit that includes cameras or features they don’t actually need. Use this decision framework to right-size your system.
Start with the minimum viable security layer
For many homes, a strong baseline is:
- Door/window contact sensors on primary entry points
- A control hub (or equivalent system brain)
- At least one indoor or outdoor siren/alert mechanism (depending on system design)
- Optional cameras focused on approach routes and verification
Then add cameras and additional sensors only where they solve a specific problem (e.g., you want evidence of who approached the door).
Choose cameras based on placement and alert quality
When comparing cameras, focus on:
- Field of view and whether it covers the area you care about.
- Night performance (especially for outdoor cameras).
- Power method (battery vs wired) and how that affects maintenance.
- Alert behavior: how motion detection triggers notifications and whether you can customize zones.
General guidance: if you can’t reliably place cameras to reduce irrelevant motion, you may end up paying for subscriptions while ignoring alerts.
Don’t ignore the “boring” parts: app, accounts, and permissions
Security systems are software-driven. Before committing, confirm you can:
- create user accounts for household members,
- control notification settings,
- review event history, and
- manage device firmware updates.
Overpaying can also occur when a system’s features are locked behind subscriptions you didn’t anticipate.
Ownership and maintenance: what you’ll actually do after installation
Even the best system can underperform if it’s not maintained. Plan for ongoing tasks.
Battery and device health
- For battery-powered sensors, set a reminder to check battery status in the app.
- Replace batteries before they fail to avoid sensor “offline” events.
- Outdoor devices may require more frequent attention depending on temperature and usage.
Camera upkeep
- Keep lenses clean and ensure mounting angles remain correct.
- Review alert settings periodically to reduce false notifications.
- If you use cloud storage, confirm retention settings match your needs.
Test your system (and your response plan)
At least occasionally, test:
- that sensors trigger alarms correctly,
- that notifications reach your phone,
- that monitoring (if used) receives the signal, and
- that you know what to do when an alarm occurs.
Many “security failures” are actually response failures—people don’t know how to interpret alerts or what happens next.
Safety and privacy considerations
Security systems can improve safety, but they also create data and privacy responsibilities.
Privacy basics for cameras and audio
- Be mindful of camera angles that capture neighbors’ property.
- Understand whether audio is recorded and how long it’s retained.
- Use strong account passwords and enable multi-factor authentication if available.
False alarms and how to reduce them
False alarms waste time and can lead to alarm fatigue. Common causes include:
- motion sensors aimed at HVAC vents or moving curtains,
- outdoor cameras triggering from trees, insects, or headlights,
- doors or windows not fully aligned with contact sensors,
- low battery causing intermittent behavior.
Most systems allow you to adjust sensitivity and define motion zones; use those controls early.
Common mistakes that lead to overspending
- Buying a full camera kit when door/window coverage is the bigger gap.
- Ignoring subscriptions for monitoring and cloud storage.
- Assuming compatibility across brands without checking device lists and hub requirements.
- Overlooking connectivity (weak Wi‑Fi at the sensor location).
- Skipping testing after installation, then discovering issues during a real event.
- Not planning for expansion and later replacing the hub because it can’t support new devices.
Step-by-step: a practical buying process
Use this workflow to choose a system that fits your home and budget.
Step 1: Make a coverage list
- List every exterior door and accessible window.
- Mark which areas you want camera coverage for (approach paths, driveway, porch).
- Decide whether you need indoor motion detection based on your layout and routines.
Step 2: Choose monitoring strategy
- If you want help dispatch capability and reduced response time, compare monitored options.
- If you’re comfortable responding quickly yourself, unmonitored may be cheaper.
Step 3: Compare systems using the same checklist
- Communication method for alarms (Wi‑Fi only vs cellular backup).
- Local vs cloud storage and retention options.
- Battery and power requirements for each device type.
- Ability to add devices later without replacing the core hub.
Step 4: Right-size the starter kit
- Start with entry-point sensors and only add cameras where they provide verification.
- Avoid “premium” features you won’t use (e.g., advanced analytics) unless they solve a specific problem.
Step 5: Set up alerts and test
- Configure notification rules (who gets alerts, when, and for what events).
- Test each sensor and camera motion zone.
- Confirm monitoring behavior if you chose professional monitoring.
Real-world examples (scenarios) to guide your choices
These examples are illustrative; your best setup depends on your home layout and response preferences.
Example A: Apartment or small home, budget-conscious
- Prioritize door/window contact sensors for the main entry.
- Use one camera aimed at the door or hallway approach path.
- Consider unmonitored service if you can respond quickly to alerts.
Example B: Suburban house with driveway and frequent deliveries
- Add outdoor camera coverage for the driveway/porch approach.
- Use door/window sensors to detect entry rather than relying only on motion.
- If you’re away often, compare monitored options to reduce response time.
Example C: Larger home with multiple entry points
- Map entry points and cover each with contact sensors.
- Use motion sensors indoors only where placement reduces false alarms.
- Plan connectivity and power carefully; consider redundancy if alarms must work during internet outages.
Final decision framework: choose what you can maintain
To avoid overpaying, your final choice should satisfy three conditions:
- Coverage fit: the system detects the most likely entry events in your home.
- Response fit: you can act on alerts (or monitoring can act for you).
- Maintenance fit: you can keep batteries charged, cameras clean, and settings tuned.
If a system is “too expensive,” it’s often because it includes features you won’t maintain or subscriptions you won’t use. A smaller, well-placed setup with the right monitoring strategy usually delivers better value than a larger bundle.
Internal links you may want next
- How to size door and window sensors for your home layout
- Monitored vs unmonitored home security: what changes in real response
- Wireless security reliability: signal strength, placement, and battery planning
- Camera placement basics to reduce false alerts and improve evidence
- Total cost of ownership for security systems: subscriptions, storage, and upgrades
- How to set up alerts and automation without creating alarm fatigue
- Privacy and account security for smart cameras and doorbells
- A maintenance checklist for sensors and cameras (what to do monthly)
- Common compatibility pitfalls when mixing sensors and hubs
Quick checklist before you buy
- Which entry points are you covering with contact sensors?
- Do you want monitored response, and what exactly triggers dispatch?
- What happens if internet goes down—does the system have redundancy?
- Do you need cloud storage, and for how long?
- Can you maintain batteries and keep cameras clean?
- Can you expand later without replacing the hub?
Answer those questions, then compare only systems that meet your coverage and response needs. That approach is the most reliable way to avoid paying for features you won’t use.